VibeKeys User Guide
Learn how to set up and get the most out of your VibeKeys keypad
Getting Started
Unbox, connect, and start using your VibeKeys in minutes
Unbox Your VibeKeys
Remove your VibeKeys from the packaging. You'll find the keypad, a USB-C cable, and a quick start card. The device comes with clicky mechanical switches pre-installed.
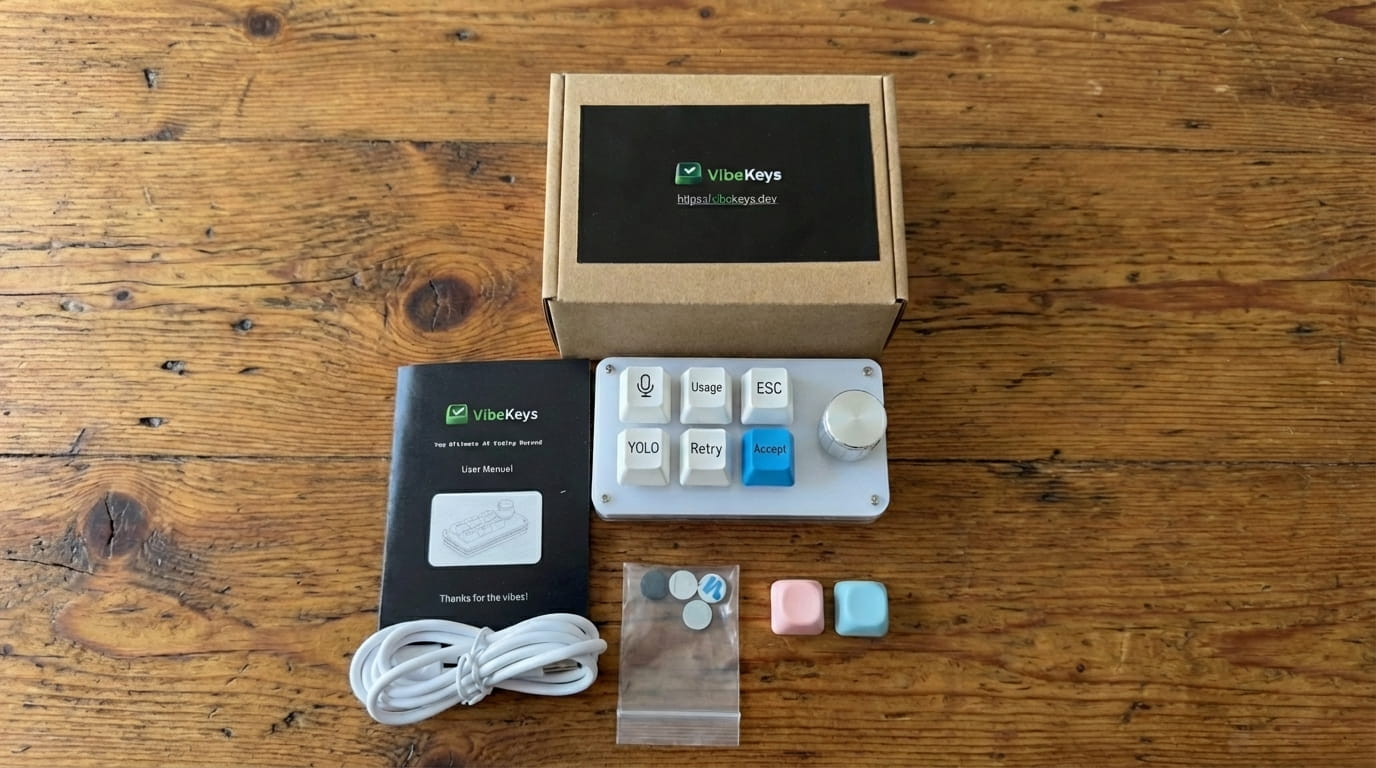
What's in the box
Connect via USB-C
Plug the USB-C cable into your VibeKeys and connect it to your computer. The device is plug-and-play - no drivers needed for basic functionality. Your system will recognize it as a USB keyboard.
Demo
Start Coding
You're ready to go! VibeKeys comes with 6 pre-programmed keys arranged in two rows, plus a rotary knob on the right. Here's what each key does:
Toggle voice input
Show statistics
Reject / Cancel
Rotary Knob
Scroll up/down
Click to confirm
Accept instantly
Regenerate
Accept suggestion
macOS Setup Guide
Special instructions for macOS users to configure VibeKeys properly
Connect Your VibeKeys
Connect your VibeKeys to your Mac using the provided USB-C cable. macOS will detect the device and ask you to identify the keyboard.
Connecting VibeKeys to Mac
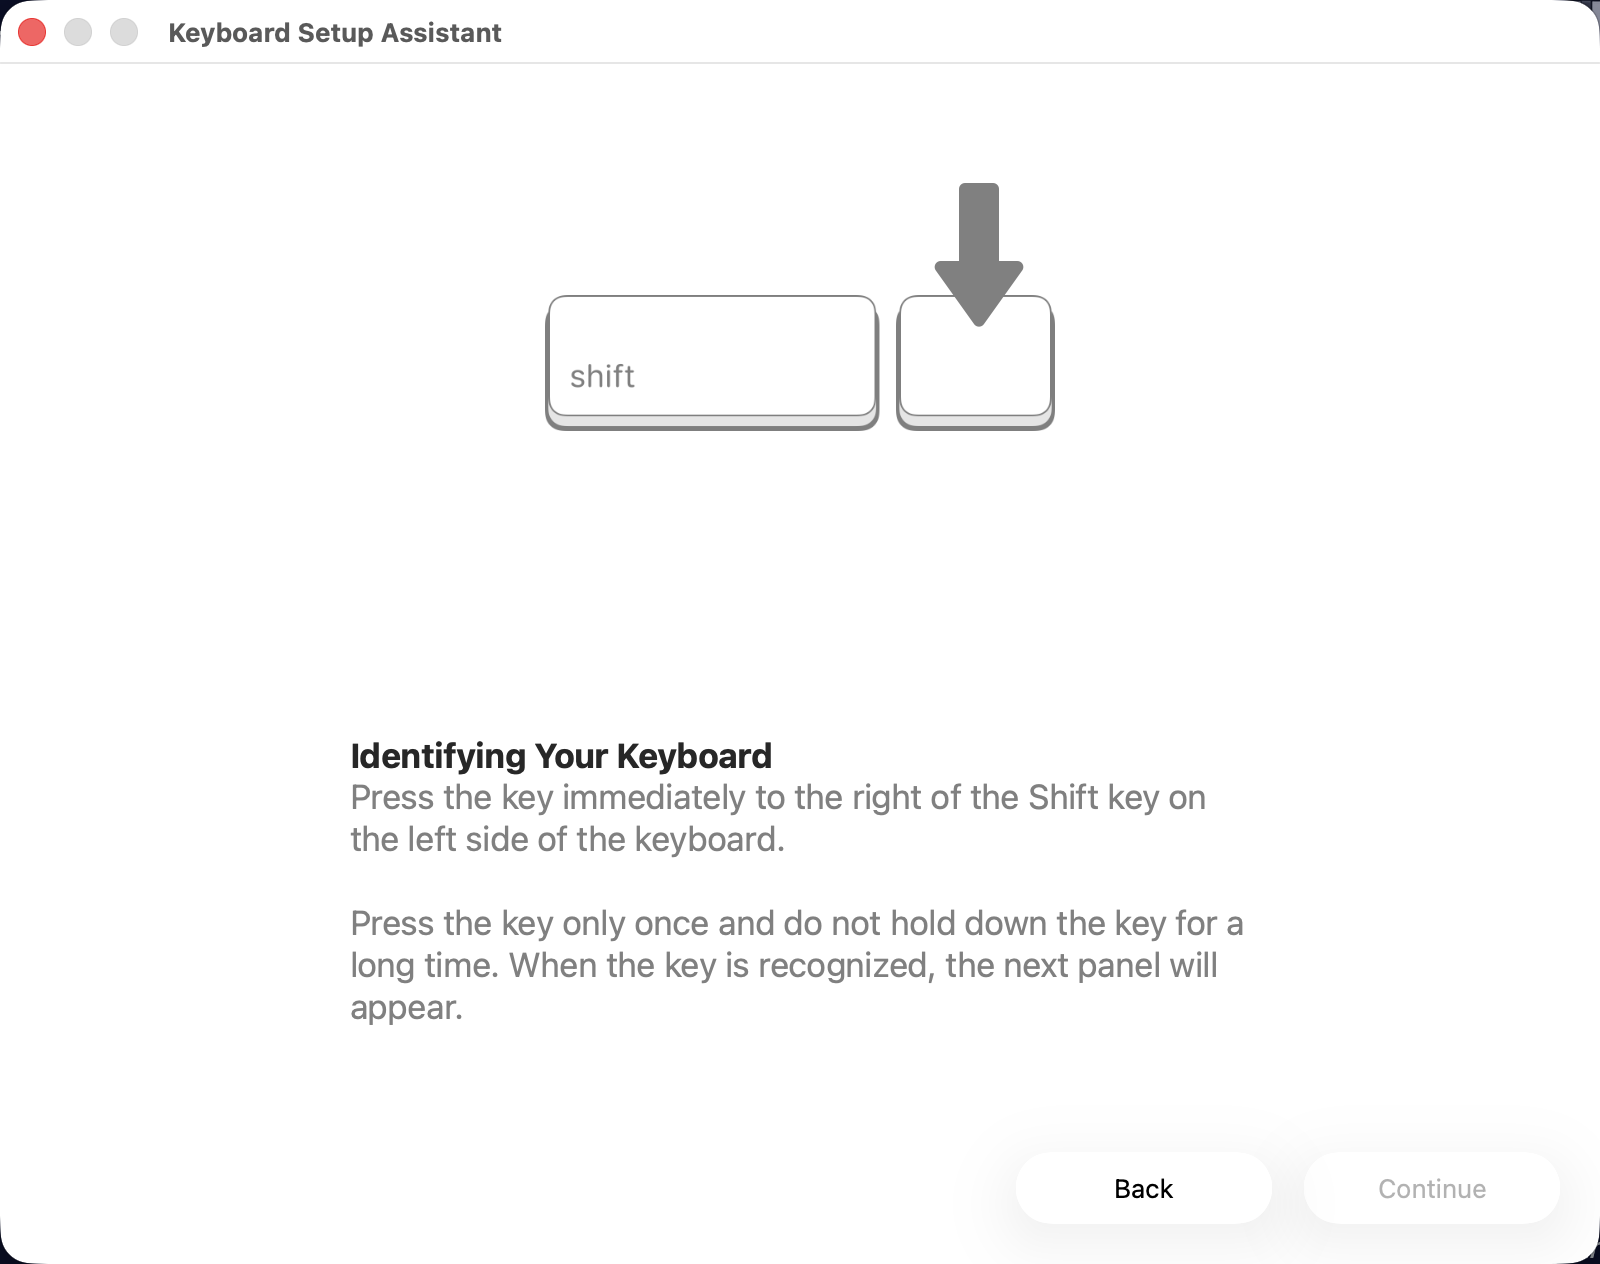
Press Any Key When Prompted
Press any key on your VibeKeys device to activate the keyboard identification. It's normal that macOS displays the keyboard setup assistant with the message "The keyboard cannot be identified" or similar.

Press any key on VibeKeys
Select Keyboard Type
In the keyboard setup assistant, you'll see options to select your keyboard type. Simply choose any type from the list and click Done. That's it!

Selecting the correct keyboard type
Voice Input
Set up and use voice dictation for hands-free coding
Choose Voice Dictation Software
VibeKeys works with popular voice typing applications. Choose Typeless or WisprFlow depending on your preference. Install your preferred software before continuing.
Configure Your Voice Software
Important: Configure your voice dictation software to use the Option key (macOS) or ALT key (Windows) as the toggle shortcut. This is required for the VibeKeys Voice key to work properly.
Option A: Typeless
Open Typeless Settings → Keyboard Shortcuts → Set toggle to Option/ALT key
Configuring Typeless
Option B: WisprFlow
Open WisprFlow Preferences → Shortcuts → Set toggle to Option/ALT key
Configuring WisprFlow
Start Dictating
Press the Voice key to activate dictation, then speak your commands, instructions, or code. Press it again when done. Works great with AI coding assistants for natural language instructions.
Customization
Personalize your key mappings and knob behavior
Download and Open VibeKeys Configurator
First, download the VibeKeys Configurator for your operating system (Windows or macOS). Once downloaded, launch the app and it will detect your connected VibeKeys device automatically.
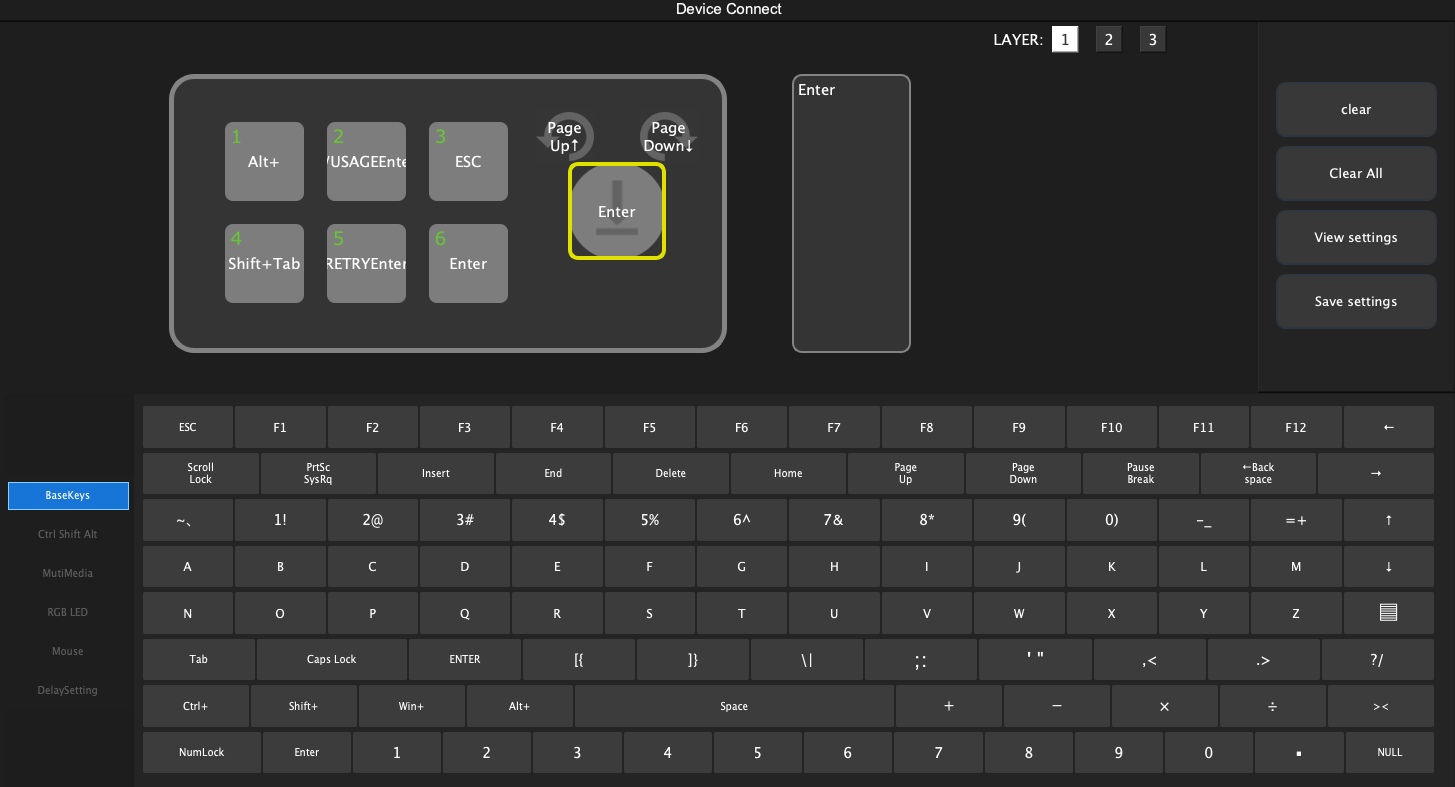
Opening the configurator app
Customize Keys and Knob
Click on any key in the configurator to assign a new function. Choose from keyboard shortcuts, media controls, or custom macros. You can also customize the rotary knob's rotation (scroll up/down) and click behavior. The knob is perfect for scrolling through code or AI suggestions.
Customizing keys and knob